This is my third and final post in this series about getting started with writing Lambda’s in Rust. So far, we have created a new lambda, cross compiled it to run in the AWS Lamdba environment, and added some logging so we can debug issues and see how the code is executing.
In this final post, we will add tests and setup Github Actions to verify these test on any Pull Request.
You can check out the previous posts here
Let’s add a test
Now that we have some code and logging in place, there is one final thing I want to cover before we could consider adding more code. We should quickly look at how to test this code.
The AWS Lambda Rust Runtime makes it easy to test your handler code. When we look at the existing main() method we see that we are just registering our handler function func with the lambda_runtime.
This forces a nice decoupling between the code wiring up the lambda environment, and the business logic in the handler function.
Business logic
In the “hello world” example, the business logic is as follows:
- Check for a “firstName” value in the incoming event.
- If firstName is found, return “Hello, [firstName]!”
- If firstName is NOT found, return “Hello, world!”
Writing a test
The easiest way to add test code, is to create the tests in the same file as the function we are trying to test.
In our example we will add a new test directly in the src/main.rs file.
Here is the code we will add as the bottom of the file
main.rs
#[cfg(test)]
mod tests {
    use super::*;
    use lambda_runtime::Context;

    #[tokio::test]
    async fn test_func() {
        let context = Context::default();
        let payload = json!({"firstName": "James"});
        let event = LambdaEvent { payload, context };
        let result = func(event).await.unwrap();
        assert_eq!(result["message"], "Hello, James!");
    }
}
You may notice that we are using #[tokio::test] and that the test itself is marked async, this is because the lambda rust runtime is using the tokio framework and when testing async function we need to using these constructs.
First, we create the test Event using a default Context, and a JSON event with the proper field. Once we have created our test event, we are able to use that as the payload to call our function func(event). We use the await.unwrap() to get the result since our handler method func is an async function.
The test_func itself is a “happy path” test, verifying that we will get the expected output when the “firstName” field is found in the event. The final step of the test is to assert that the returned value matches the expected “Hello, James!”
Adding a second test
Now that we covered the “happy path” logic, we should add one more test to cover the case when “firstName” is not found
In the same mod test block, we can add a second test.
#[tokio::test]
    async fn test_func_bad_request() {
        let context = Context::default();
        let payload = json!({"something": "wrong"});
        let event = LambdaEvent { payload, context };
        let result = func(event).await.unwrap();
        assert_eq!(result["message"], "Hello, world!");
    }
This test follows the same format as the previous, with the difference being the payload is updates with different JSON value. We expect that the handle will return “Hello, world!” in this case.
Running test
Now that we have created some tests, lets run them with cargo
cargo test
We should get output like this
running 2 tests
test tests::test_func_bad_request ... ok
test tests::test_func ... ok
Success! We can see that cargo found the 2 tests, and both are passing.
Automating test with Github Actions
Now that we can run tests locally, it would be nice to have them running automatically when we create a new PR for our project.
Adding github actions
This is really easy to setup, using actions-rs.
This project provides a toolkit of GitHub Action for Rust projects.
We need to create a rust.yml file in .github/workflows/rust.yml
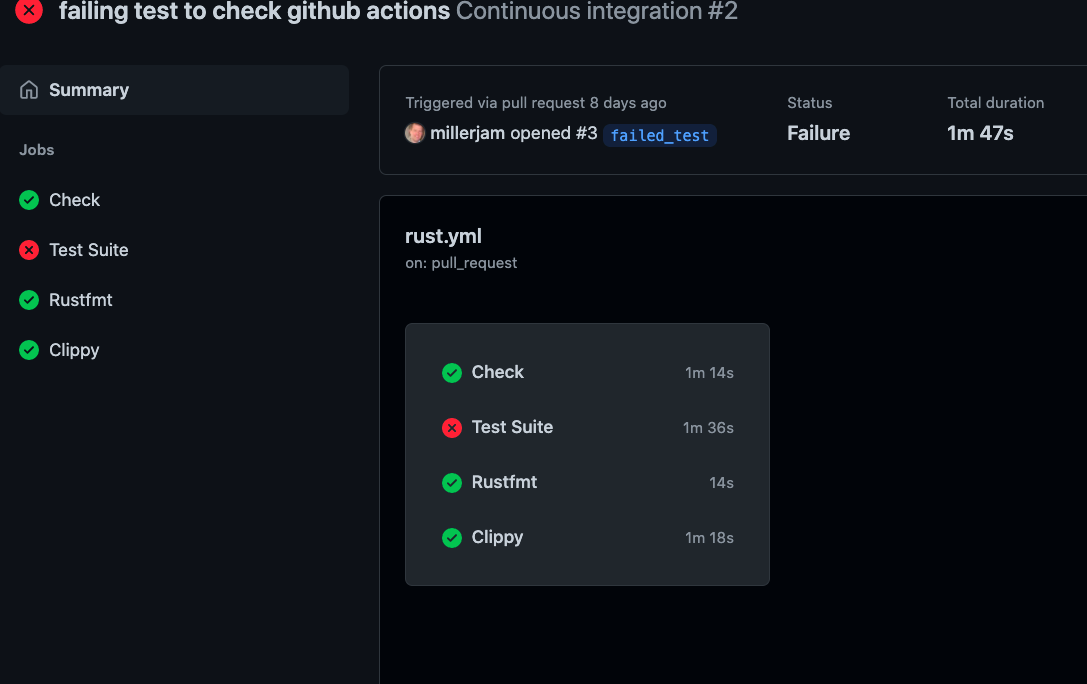
The yaml file will contain “jobs” for the cargo commands check, test, fmt, and clippy. This will make sure that all PRs made against our repo, are properly formatted, have passing test, and passing all standard rust linting checks.
The entire file is here https://github.com/millerjam/rust_lambda_hello_world/blob/main/.github/workflows/rust.yml
One you have committed this file into your github repo, you will see it populated in the “Action” tab
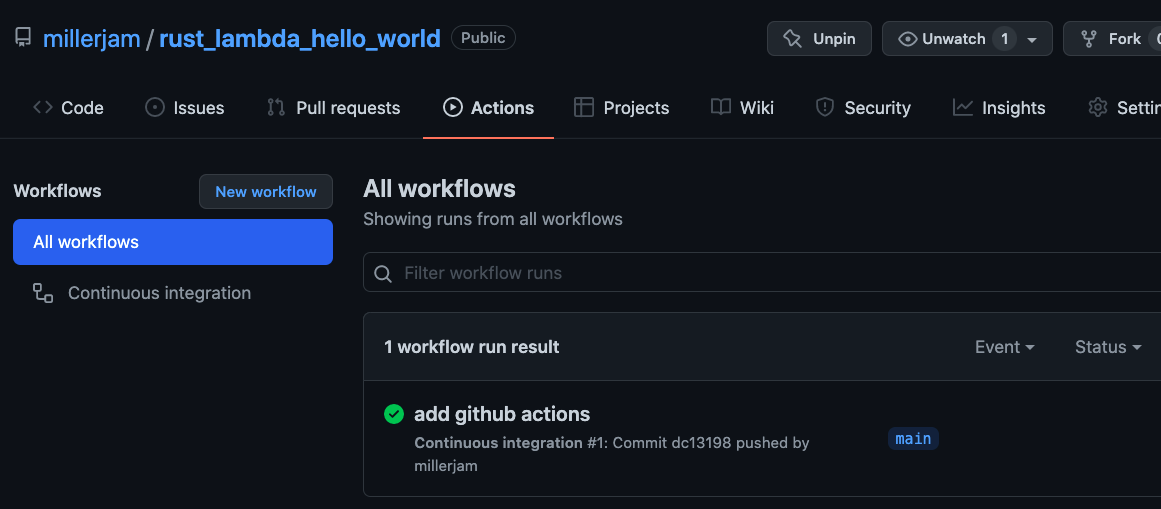
Passing PRs will show a green check, and if any of the checks fail the PR will be marked as failed. And selecting the failed action will show the 4 jobs and which has failed
Conclusions
Now, we have a completed “hello world” lambda example. We created:
- An hello world lambda function
- Cross compile the lambda
- Deployed it into AWS
- Added logging
- Added tests
- And finally, added continuous integration with GitHub Actions
Final GitHub Project
You can reference the complete project here in my github repo https://github.com/millerjam/rust_lambda_hello_world